3.27.2012

Festival Of Scrappiness!!

Yesterday kicked off the Festival Of Scrappiness over at Stitched in Color!!!  Whhohohooo!!

banner from Stitched in Color!
It's a celebration of the beauty and joy of scrap quilting.. and you all know how much I love the challenge of creating with my scraps!!  And... there are prizes... tons and tons and tons of really amazing prizes!!  So, if you are on the edge of participating I hope you give in and join us! 
I am going to be submitting two art quilts.. my two most recent top finishes... both done wholly from scraps which makes me beam with love!!

First up... At Sunrise, which is made from a confetti quilt style that uses toothpick sized scraps as 'paint' to create a scene.  My favorite part of this one is the texture that all those scraps and quilting creates!!  And .. I'm slacking.. still need to a fix the binding to the back... so close to calling this one done!

You can see the beginning of the piece here.


I am also going to submit my landscape quilt, called The Lake, that was done with freezer paper stencils and a bunch of yummy scraps!  I have had so much fun quilting this one... and I think I have the perfect binding picked out as well.  If I could only find a few minutes to put it on. 

You can see this art quilt coming together here.


And there you have it!!  Scrappy wonderfulness abounds.. make sure even if you aren't entering to hop over and take a look at all the other entries.  It's all so really inspiring and makes me want to whip out my scraps and start something new!

Happy scrapping!

3.23.2012

Happy Moment #51: The Rocks are Multiplying

A Friday ritual with Soulemama.  A single (or a few) photo - no words - capturing a moment from the week.  A simple, special, extraordinary, happy moment.  A moment I want to pause, savor and remember.  If you're inspired to do the same, leave a link to your 'moment' in the comments too.


And if you missed the earlier episode of us knocking down the retaining wall... check it out!

“Be happy for this moment. This moment is your life.”
~Omar Khayyam

3.22.2012

Spring is Springing!

The weather is warm, the trees are budding and growing leaves, the grass in greening, and flowers are popping!  I'm enjoying slowly getting back to my gardens and watching the show unfold!


3.21.2012

Wednesday WIP: A Few Almost Done's

The summer-like weather pulled me outside for the most part and you can see how we spent that time tearing down a wall.  I still somehow managed to put time into The Lake and it's just about ready for binding!!
 
--THANK YOU!!--

I'm feeling like such a lucky duck after winning a $30 gift certificate to Fat Quarter Shop from Bethany over at Sweet Bee Buzzings!!  Thank you Bethany for letting me indulge on a bunch of fabric!!  It was such a treat to pick out ones I liked without a specific project in mind!  And the fabrics came lightening fast... it's always a pleasure to shop at Fat Quarter!  And as I promised... here is what I picked out:

{from the top down}
1/2 yard of Wood Lawn Batiks in Antique Beige Shibori ... I'm thinking it's the perfect binding for The Lake
1/2 yard of Desert Springs Batiks in Cool Blue Watercolor Texture
.875 of Cocoa Bery Brown Bonehead (skulls!!!)
1 yard of Prince Charming Aqua Dandelion
1 yard of Scandinavian Christmas Cream Tiny Toadstools


--GETTING BINDING--

{At Sunrise}: Confetti Quilt - I still haven't sewn down the back of this binding...


{The Lake}: Landscape Quilt - I made a ton of progress on this piece and in fact... I think it's nearly ready for binding!! 


--PAUSED--
  • Laughing Leaves with Frieda Anderson
  • Spinning Starlets {English Paper Piecing}
  • {Your're My Sunshine}: Bottled Rainbows {ticker tape quilt-along}
WIP Wednesday at Freshly Pieced

This Week's Work in Progress (WiP) Stats:
Last WiP Wednesday Total: 5
New Projects: 0
Finished Projects: 0
Total WiP's: 5 (same as last week)

3.20.2012

Veggie Garden Retaining Wall

This past weekend we enjoyed the most delightful sunny weather.  The kind of summery feeling day that draws the whole family outside to soak in the rays, feel the breeze, and get our hands (or paws) in the dirt.

We were minding our own business.  Dreaming of seeds to sow and veggie garden layouts. 


And then it happened.


The brick retaining wall, who has seen better days... 


...looked at us funny...


...so, we tore it down.


And made a big mess.


And I know there is a bunch more work to go... but squee! we're building the expanded veggie garden of my dreams, complete with a hand built natural stone retaining wall.  


Can you see it?  It's going to be amazing!! 

p.s. and that's how I spent most of my weekend.  Yes, we did cook down the final batch of maple syrup.  no, I still need to take a picture to share here.  and yes, that was our christmas tree holding down the woods as a natural bird habitat... at least that's what I keep telling the Mister.

3.16.2012

Happy Moment #50: What I Made

A Friday ritual with Soulemama.  A single (or a few) photo - no words - capturing a moment from the week.  A simple, special, extraordinary, happy moment.  A moment I want to pause, savor and remember.  If you're inspired to do the same, leave a link to your 'moment' in the comments too.


Made for the Name Game Swap for Josie McRazie at Insanity Defense

3.14.2012

Wednesday WIP: This Sewing Factory is Crankin'

I have managed a bit of very focused sewing which is allowing me to reach my goal of finishing a ton of things by the weekend for a swap and to enter two shows.  I wasn't really sure I'd be able to get it all done, but it's happening!!
 
--FINISHED--  Name Game Swap
Finished this mini quilt up and popped it in the mail.  My secret swap partner should be getting it today or tomorrow!  Below is a little sneaky peak.  I'll show the whole thing once it reaches it's new home!


--GETTING BINDING--  {At Sunrise}: Confetti Quilt
My confetti style quilt which you can see the making of here, is ready for binding.  In fact, I did pick out and attach the binding to the front (not pictured).  So, all I have to do is hand sew the binding to the back, make a hanging sleeve and label... and this one is D-U-N!

And yes.... seriously, this is hands down one of my favorite pieces!  It's a scene which I have had in my head for a long time and I'm glad it's finally down in fiber!


--IN PROGRESS--  {The Lake}: Landscape Quilt
You might remember that I started this art quilt in a guild class recently and I am determined to finish it in time for the next guild meeting (next Tuesday)... and that also means that I could still enter it in my upcoming work art show. 

I spent time last night cutting out the rest of the template pieces, cutting mountain and sky fabrics, and sticking them together.  The hardest part of this freezer paper technique is that you can't see the work progress because it's, well, covered with freezer paper.  I'm going to leave you with this teasing picture of it. 

If you're wondering... I did pull the freezer paper off the whole thing last night and I adore it so far.  I also gave it a backing, basted it, and started to quilt it.  Feels like my little sewing 'factory' is really humming along nicely!! 


--ON PAUSE-- 

Laughing Leaves with Frieda Anderson
More of the project can be seen here.  I am really darn tempted to try and finish up this piece over the weekend as well.  I know.. I know.. call me crazy, but this would give me a final piece to enter in my work art show!

Spinning Starlets {English Paper Piecing} -- a.k.a. I've reached a new level of crazy!
I will pick this up again once my quilt show pieces are d-o-n-e; only 6 weeks to go!  Following along with the Block Party at Selfsewn; creating Rose Stars.  You can read about my overall experience with English Paper Piecing!

Still no deadline for this one.  The way things are going, maybe I pick this up once my show pieces are done?

WIP Wednesday at Freshly Pieced

This Week's Work in Progress (WiP) Stats:
Last WiP Wednesday Total: 6
New Projects: 0
Finished Projects: 1 (Name Game Swap mini)
Total WiP's: 5

3.13.2012

Making Maple Syrup {Part II}

Tapping the Maple Trees {Part I}
A Look at Maple Tree Sap
Making Maple Syrup Intermission

The maple syrup adventure continues, you may remember we had already tapped trees, collected sap, and were ready to boil.
----------------------------------------------------------------------------------------------------

The Mister is extraordinary at building things... and made us an on the cheap sap cooker that we use to heat a gigantic pot.  We built a wood fire, poured about 4-5 gallons of sap is in the pot, and then watched. 


 We talked and laughed and watched the pup silly antics.  This is Sammy.


The dogs chewed sticks to pass the time. 


I took pictures.  (Sammy again)


(Katie here)


See that steam coming out of the pot?  It's working.  Takes a lot for all that water content to burn off to leave the sweet sap.


The evening progressed and we saw the sun setting over the ridge.  I still adore the look of our woodpile all neat and orderly.


Felt really good to kick up my feet and soak the whole thing in!


At one point it got dark enough that we noticed a blow torch effect of the fire coming out of our stove pipe.  Hot dog roasting anyone?


The dusk turned to dark and it was a whole new experience to sit and chat with tree stumps as seats as the sap boiled and cooked... and cooked and boiled. 


So simple and joyful sitting around a fire.  The warmth to keep away the night's chill, the glow and laughing flames.  peaceful.  centering.  balancing. 


We fed the fire, checked the boiling sap.  Stopping every now and then to stir and have a taste. 

And a natural conversation about who knows what flowed between the Mister and I.  It reminds me of one of the moments that I first knew the Mister and I were a 'thing' because we can ramble on for hours and never get bored of each other's company. 


Finally late into the night, we checked the sap and noticed it had finally gotten low in the pot and changed colors from clear to a golden brown.  That was the signal to clean up for the night.  Douse the fire, transfer the sap to an inside pot, and call it a night.

---to be continued --- we did finish a batch of maple syrup this past weekend and even enjoyed it on french toast!  Our last installment will show the finishing and the actual syrup we made!

3.12.2012

The Beginning of "At Sunrise"

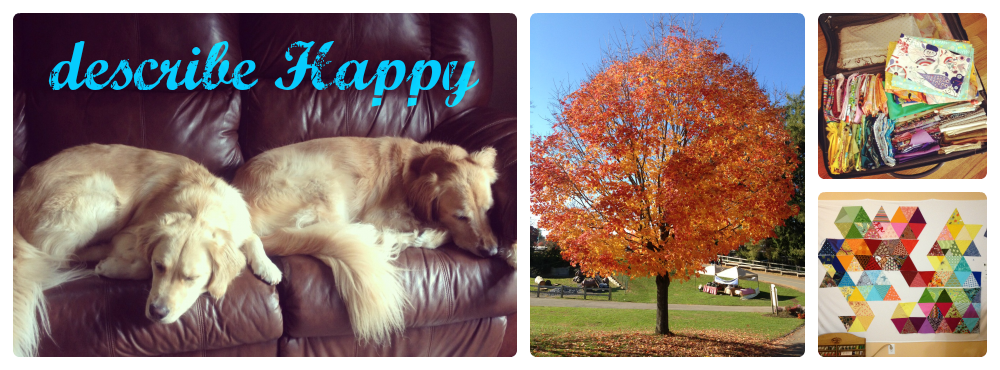
Does your sewing area ever look like this?  Come on, be honest with yourself!


Ya, mine too.  Sometimes I am going so fast and creating a ton of things at once that I skip the cleaning part of quilt making all together.  Actually, I'm not really sure cleaning is really a step anyway.

Here is my cleaning remedy...  confetti quilting.

Grab a handy piece of fabric that you might not find yourself using in your quilting any time soon.  This is also a good way to use up fabrics that were doomed for the trash.

Cut a piece of left over batting about the same size as the backing fabric and place it on top.

Now start to layer up those small bits, pieces, threads, batting and lace that are taking over your sewing station (anything that you can sew through can be put down at this stage)

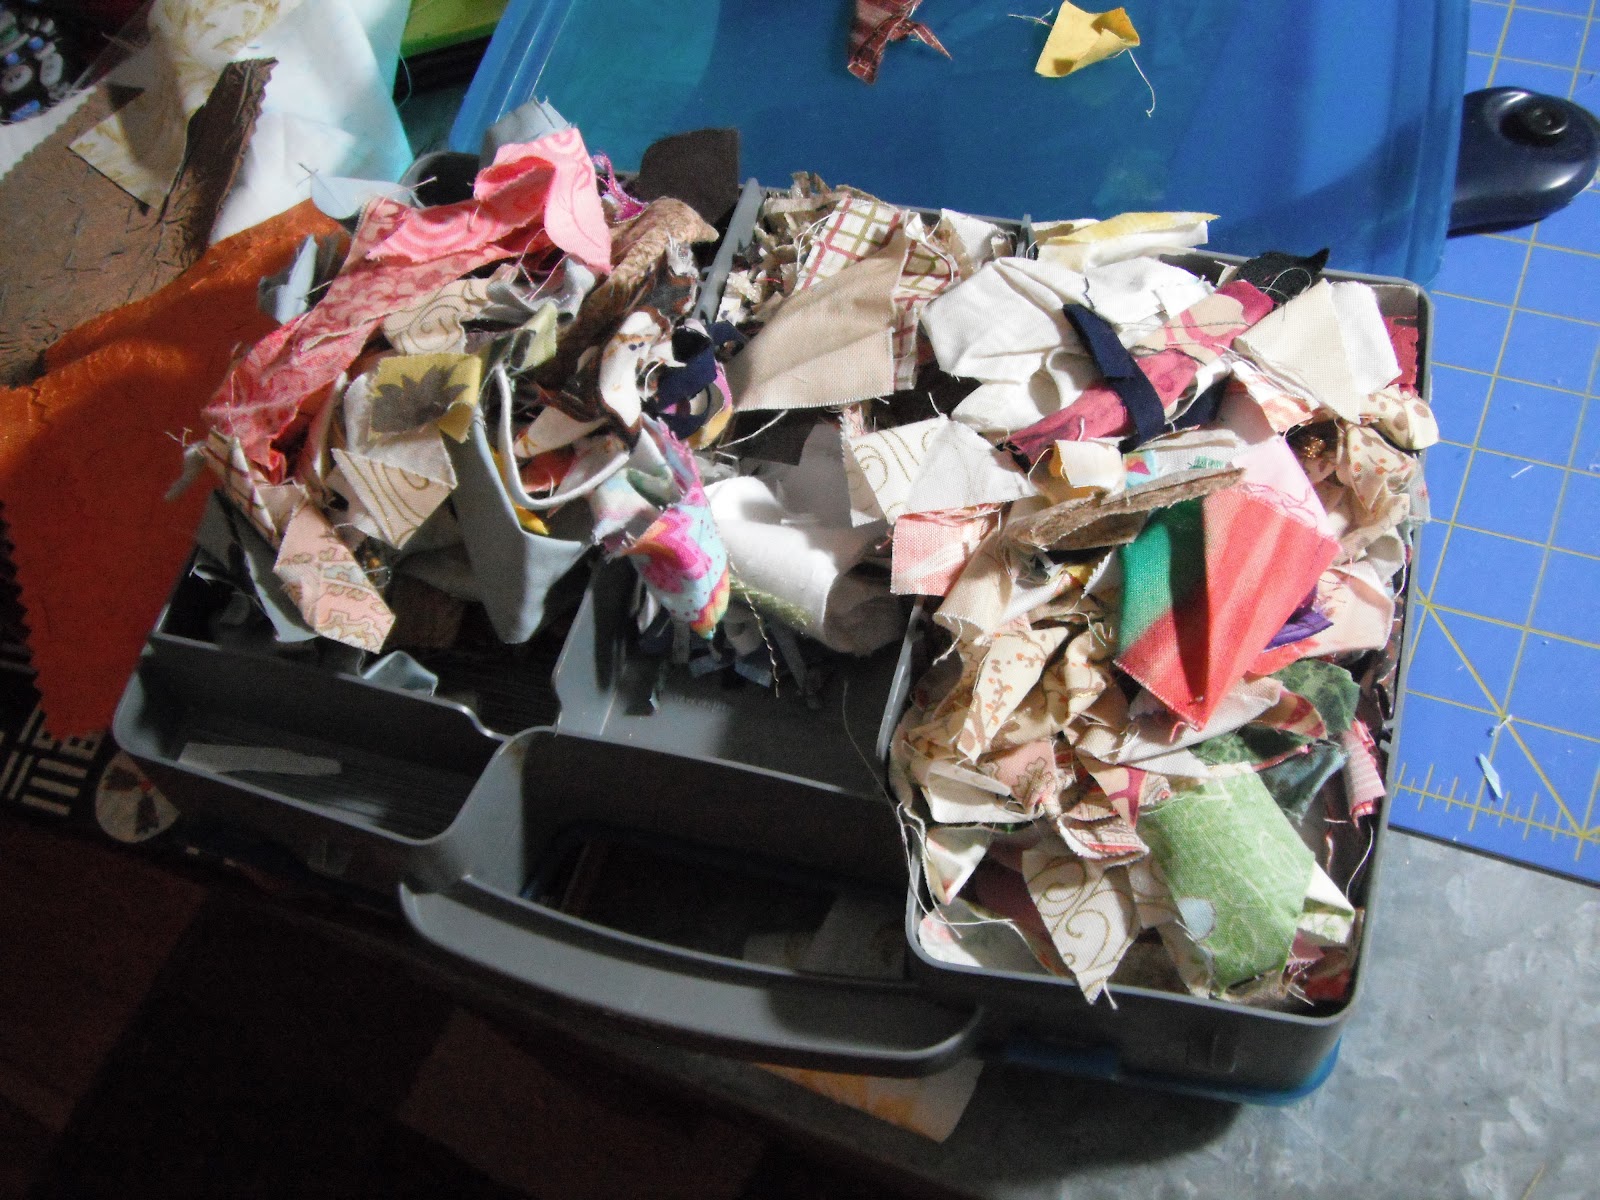
When I do get the urge to clean I take the time to separate my scraps... my large ones get folded and put in a drawer, my medium pieces are put in jars by color, and the tiniest bits get tucked into this fishing tackle container until it starts to overflow like this.

Using your rotary cutter or scissors cut the fabrics by color into toothpick sized bits.  This makes up the confetti that you will 'paint' with for your confetti quilt.

Here I am applying my confetti bits.  It's very scientific (har, har!).. I take a large handful of red... and toss, toss, scatter.  Repeat with the next color.  Really it's very freeing!

Keep adding and layering.  Remember to mix colors and textures.  Prints and solids can be used and the idea is to cover up every spot of batting although I do leave about an inch and 1/2 edge all the way around the piece.

I also found that a little hand mixing or spreading once the confetti was down helps 'smudge' the colors together.  Don't be shy to get your hands in there.

Once you have the colors you want, lay a large piece of tulle over the top and pin it down -- I use large quilting safety pins, but don't pin them shut so they are easier to remove as I'm quilting.  Next, I sewed the larger piece all the way around the outside (to secure the tulle) and then into smaller quadrants to hold the confetti approximately in place. 


The smaller quadrants also allowed me to adjust confetti pieces later as needed. 

And now you work to secure all the confetti pieces with free motion quilting.  I did wavy and swirly lines back and forth to create the sky texture and clouds from the sunrise picture I was working from.  I used pink, red, orange, yellow, blue, and purple threads to add to the overall feel.

Now that I had the background to my liking it was time for me to add the trees!  I cut out strips of black fabric... in this case an old collared work shirt my husband was ready to toss... and started to arrange them.

In this step, I also added a second layer of batting and backing... as an experiment mostly.  The background was getting a bit flat from all the quilting and I wanted the trees to take on more dimension.  It has made the quilting a bit more tricky, but I like the resulting texture.  Definitely something I can see playing around with again.


I pinned things in place once I had them to my liking.

This is the view from my window which shows the same trees I am trying to create in this piece, just from a slightly different angle.  Fun to think I am capturing them in this way!  And really fun to study how branches connect and overlap.

Yup, you guessed it.  More free motion to secure the trees.  I also found that using my walking foot worked well on the longer pieces. 

I also tried to run both black and dark brown thread through my needle.  And it did work, but I think it would work better with thread colors from the same brand.  The brown kept breaking (driving me nuts) and I decided to just use the black to keep me from pulling all my hair out. 

My last note here is that I also ended up changing my needle from a 14 to a 16... I think the extra thickness from the double batting was better dealt with by a needle meant for tougher sewing.  How did I know to change needles?  Well... I snapped the 14 after just a few inches... so that clued me in to try something else.

Here is a look at all the main trees quilted into place in a ray of sunshine pouring onto my desk.  And what glorious sunshine we had this weekend!


At this point I cut off the extra edge and the tulle that had been hanging off the edge (and getting caught in my sewing machine).  Funny how such a small thing as cutting closer to the final edge made this piece mature very fast!


And what would trees be without the hundreds of branches and limbs going this way and that?  I went back to free motion quilting and without marking set out create branches. 

I have really enjoyed this part!!  After a few more hours I managed to add branches to every tree.  And this also means that I completed my One Thing, One Week Challenge goal that I set for myself over at Amy's Creative Side.


Late last night I was trying to determine if it needed any other branches.  Of course the longer you stare at something the more you stop seeing it.  So, I decided it was a good point to walk away.  I am looking forward to getting back to this later in the day and deciding if it's in need of anything or done. 

Last step will be a pressing and binding.  And goodness me... I've no clue what color to bind with.  Hoping that idea comes to me soon -- or if you have any thoughts.. do share!!

I appologize for the extra long post, but it feels really nice to document this piece... I have a feeling it's going straight to the top of my favorites list. 

What did you work on this weekend?  And I will share the second half of our maple sugaring adventures tomorrow!
Related Posts with Thumbnails